Email Domain
Configure Email domain
Follow these instructions to use your own custom domain with emails sent from our platform.
Customer Portal
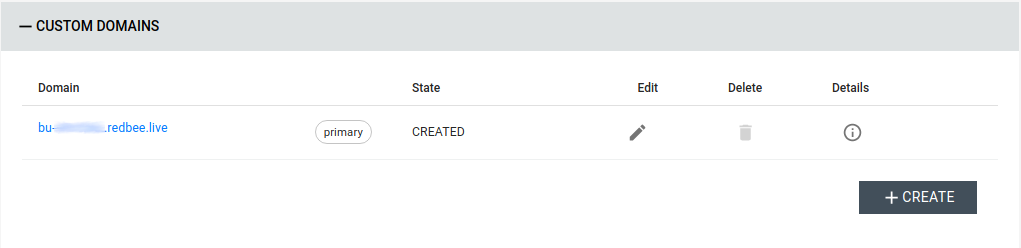
1. Navigate to domain settings
- In the context menu (on top), select:
- Customer
- Business unit
- Using service menu (on the left), navigate to:
SETTINGS->SERVICE SETTINGS
- Expand the
CUSTOM DOMAINSpanel
2. Add an email domain to the service
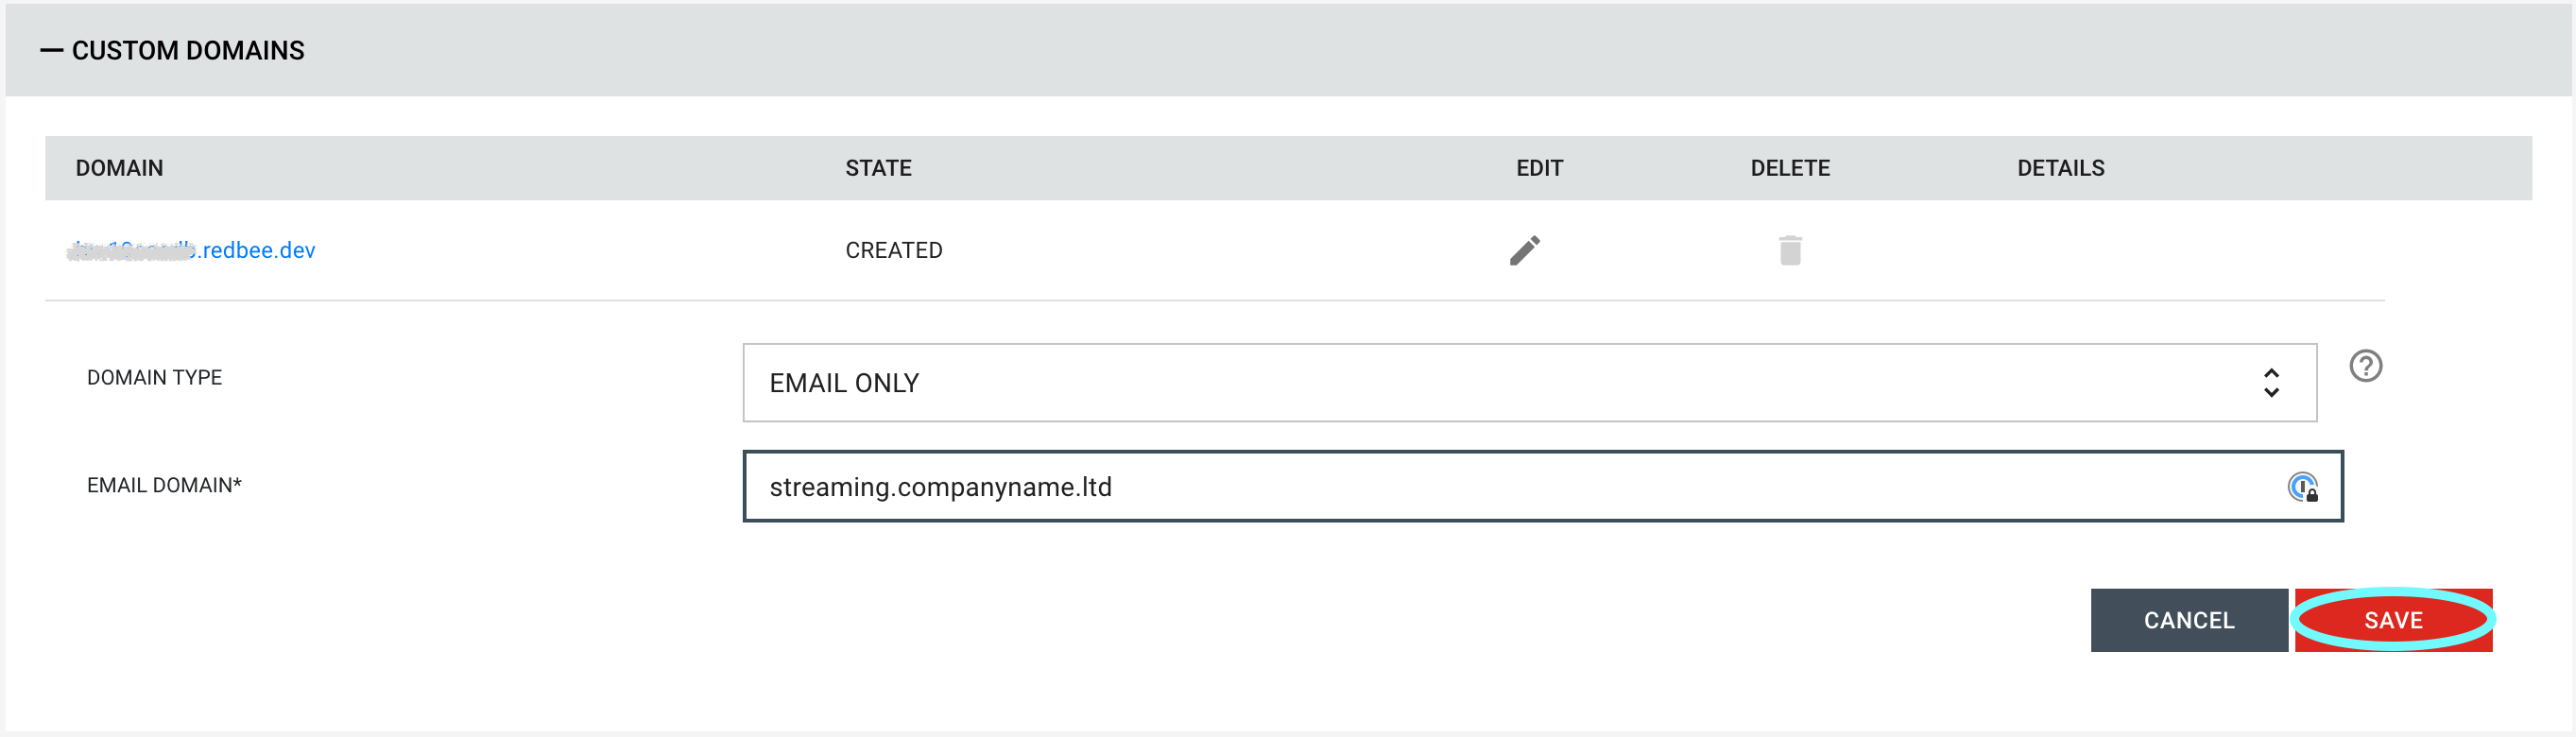
Create a new email domain
Use this option to add a domain which can ONLY be used as the domain for service emails (welcome email, confirmation email etc).
- Click the
CREATEbutton - Fill in the form:
- Select
EMAIL ONLYasDOMAIN TYPE - Fill in the desired domain name in
EMAIL DOMAIN
- Select
- Press the
SAVEbutton
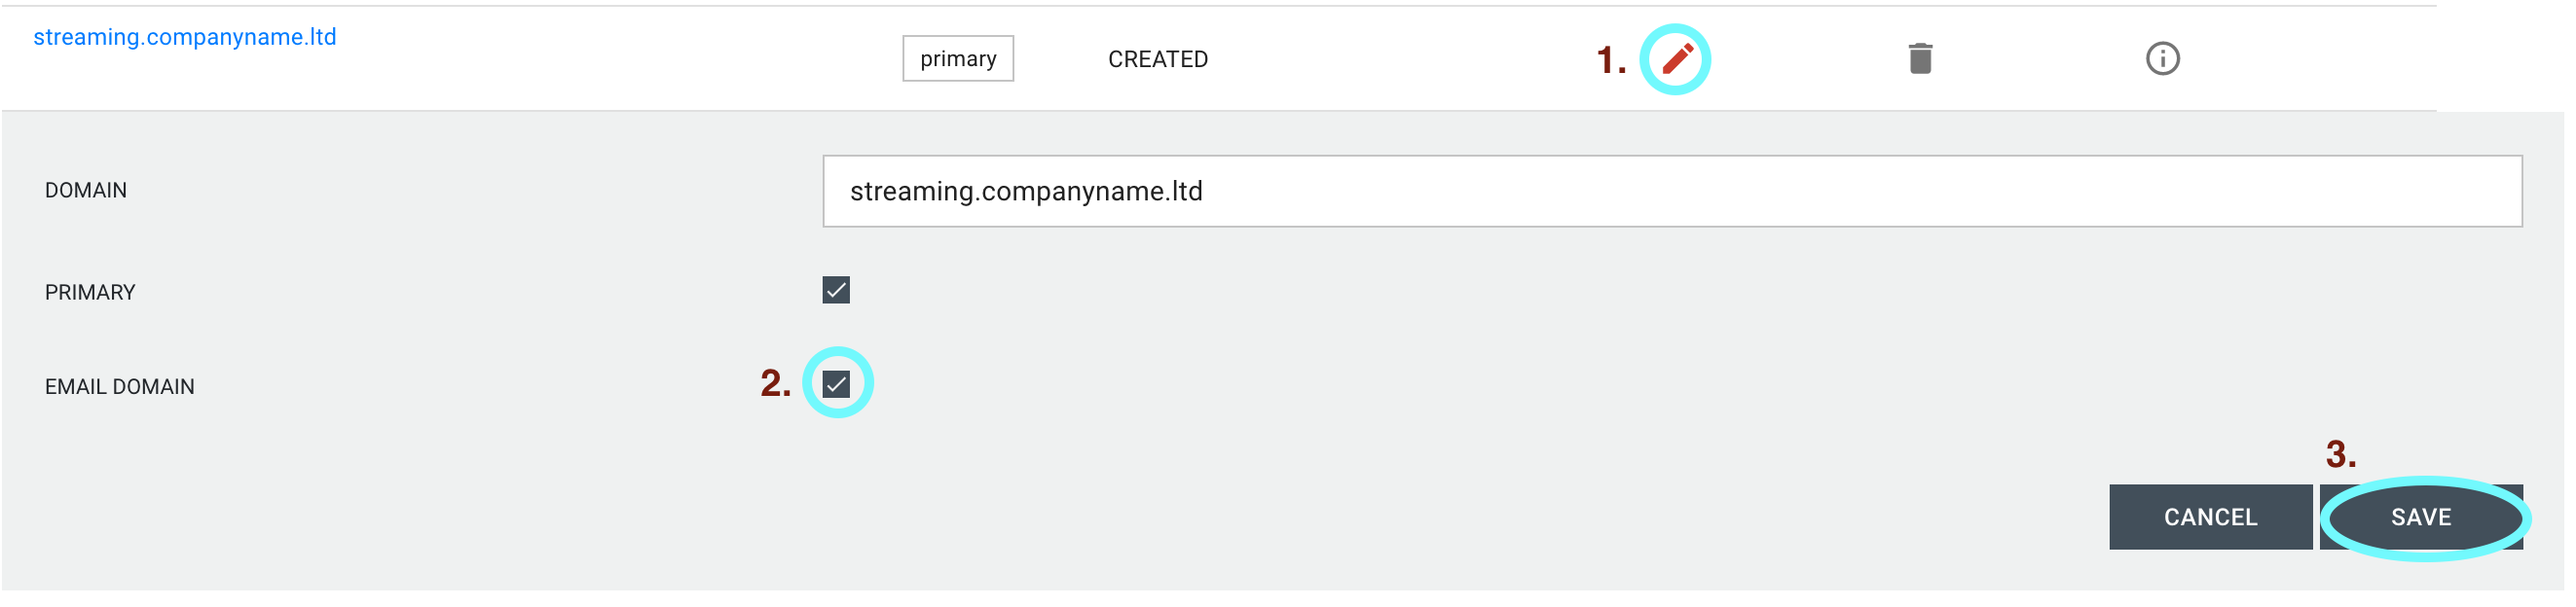
Create from existing custom domain
Use this option to utilize the same domain for serving content to users and sending out emails.
- Click the
EDITbutton on the desired domain. - Tick the
EMAIL DOMAINbox. - Press the
SAVEbutton
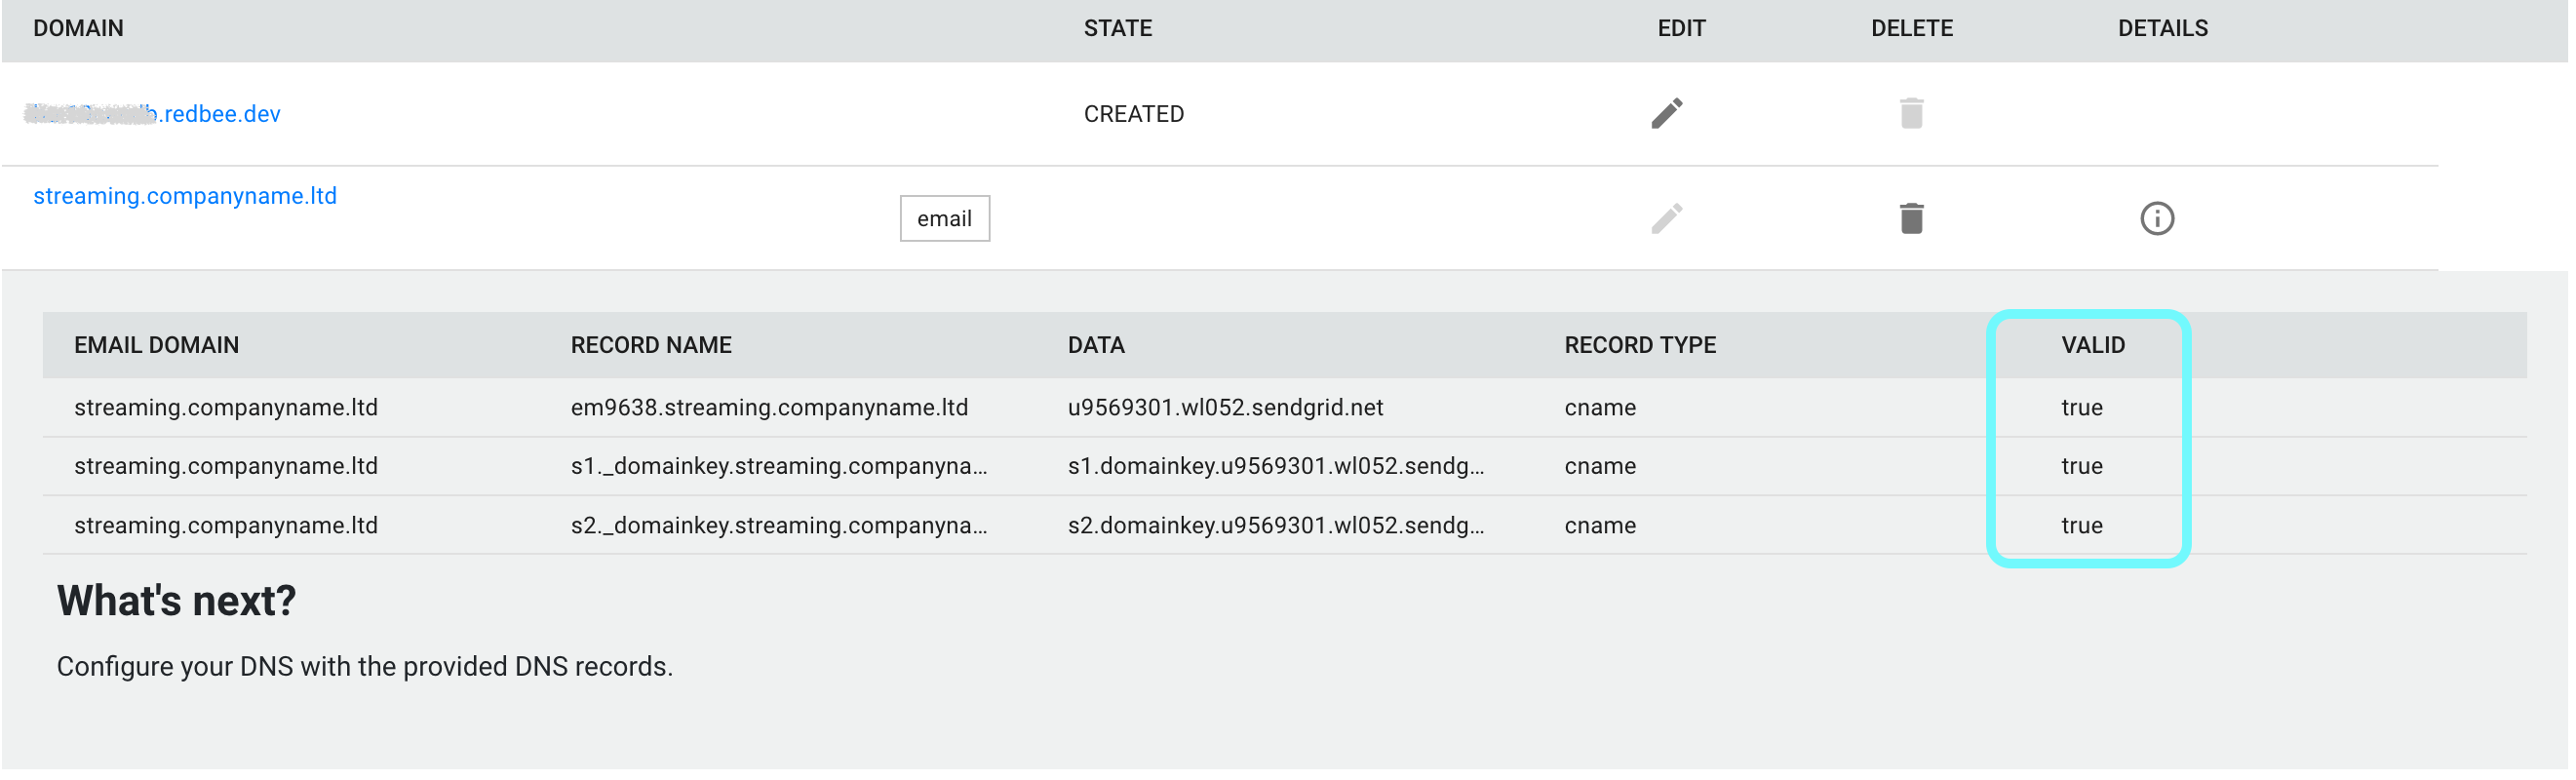
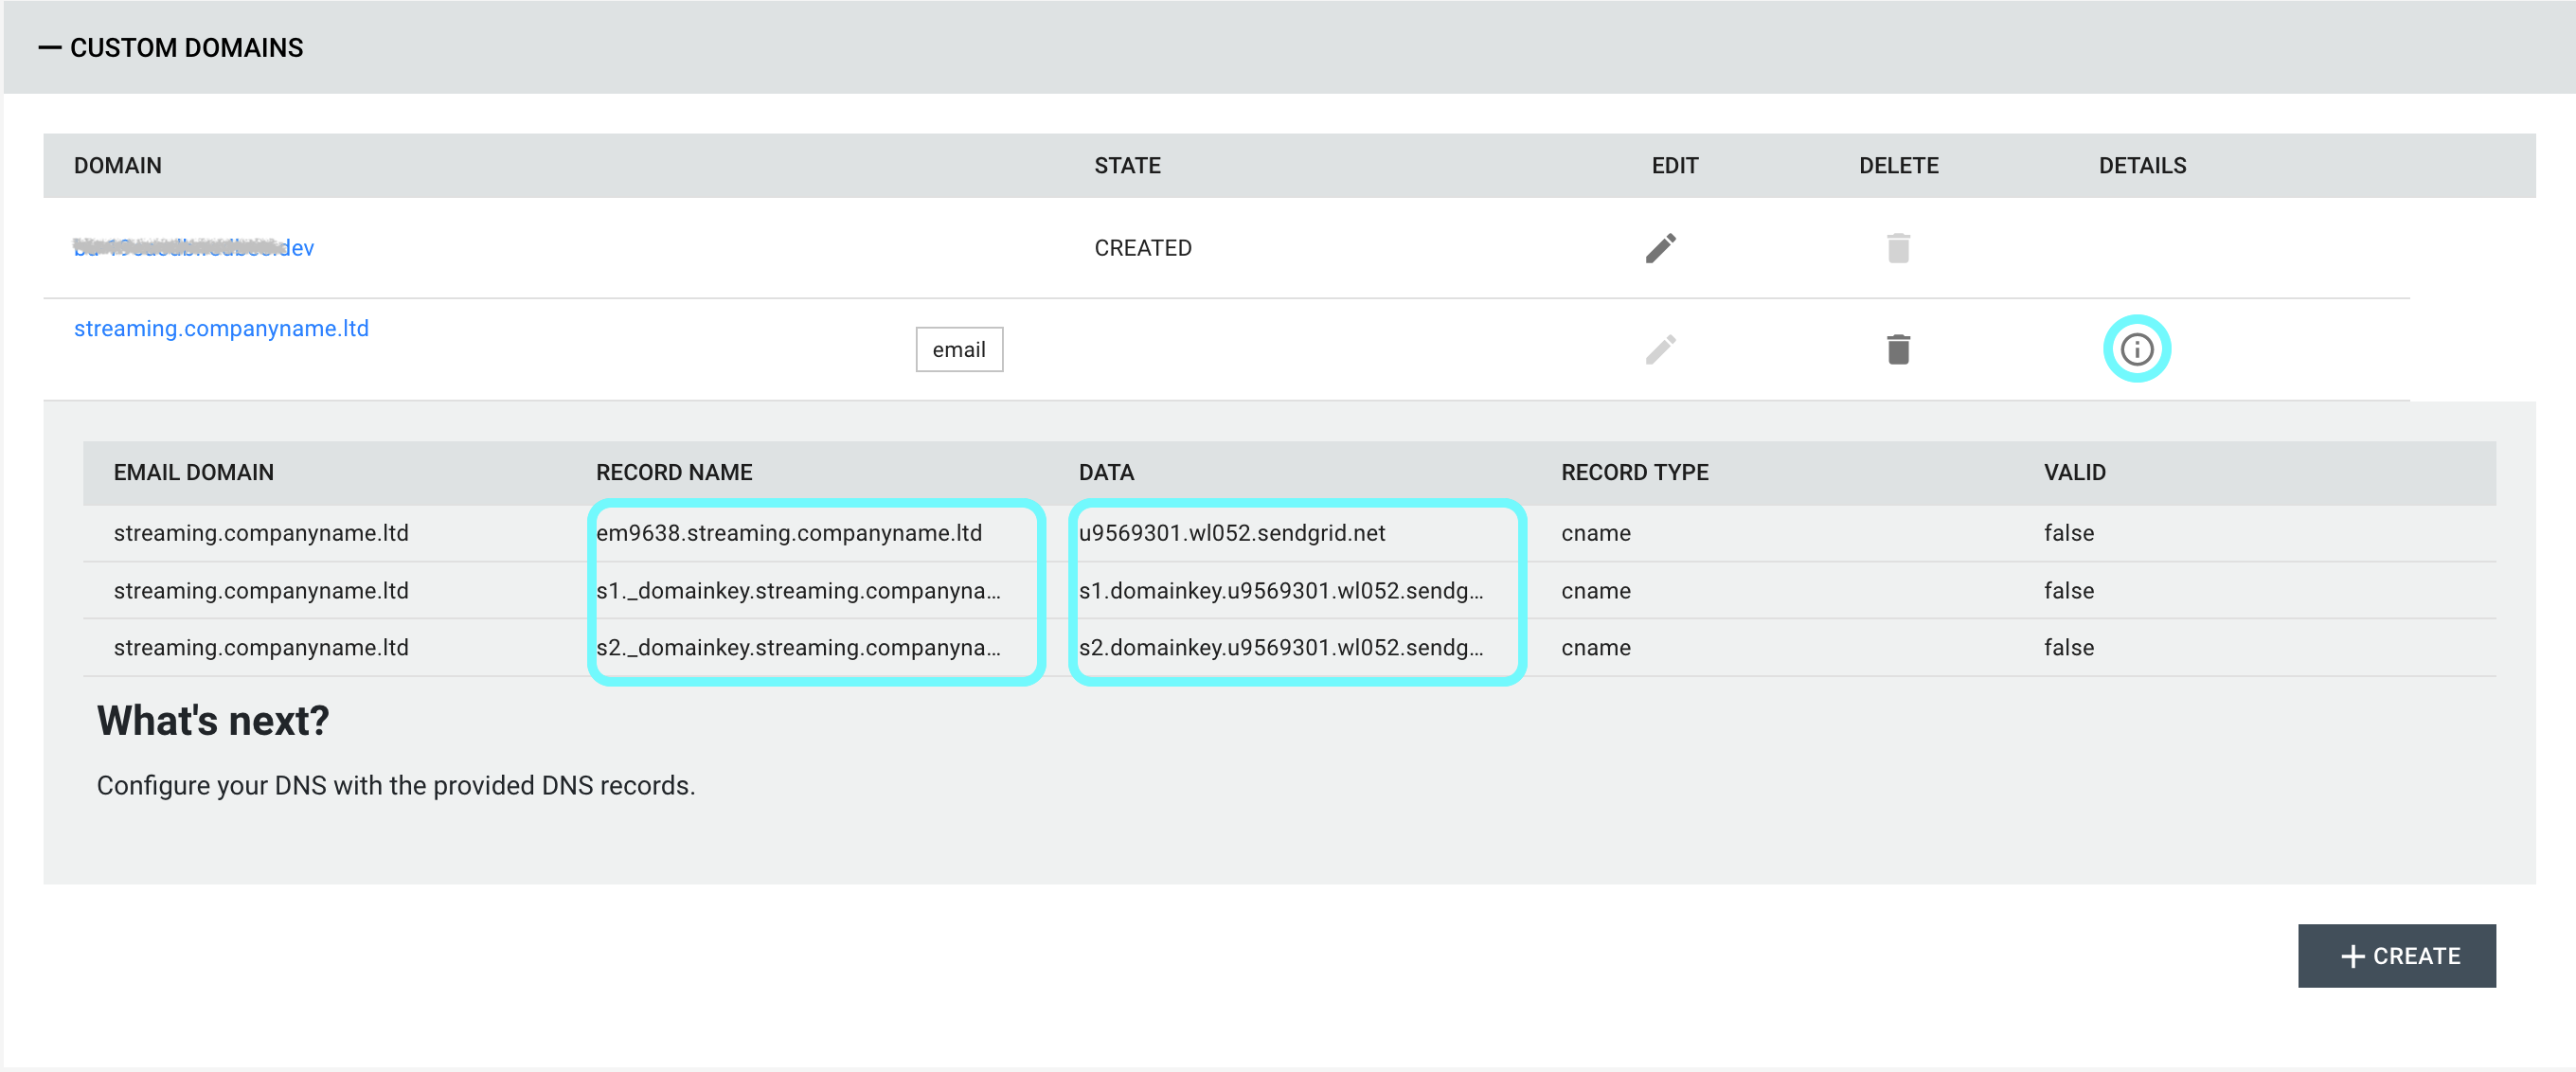
3. Gather DNS record information
The following steps are only required for custom external domains, and not for managed domains.
- Reveal the details of the configured domain by clicking its
Detailsbutton in the list. - Take note of each cname record under
RECORD NAMEandDATAfor the configured email domain.
External DNS management
Due to the wide variety of DNS providers, and their individual interfaces, this section only provides general information.
4. Create service records
To verify the email domain you configured for the service previously in the guide, create a CNAME for each record that was returned with the email domain Details.
- Create
CNAME- Name: The
RECORD NAME. - Target: The
DATA.
- Name: The
Example
Name: em9638.streaming.companyname.ltd
Target: u9569301.wl052.sendgrid.net
Name: s1._domainkey.streaming.companyname.ltd
Target: s1.domainkey.u9569301.wl052.sendgrid.net
Name: s2._domainkey.streaming.companyname.ltd
Target: s2.domainkey.u9569301.wl052.sendgrid.net
5. Configure Email Templates to use a Custom Email Domain
Now it's time to make use of the new email domain.
- Using service menu (on the left), navigate to:
SETTINGS->SERVICE MAIL TEMPLATES
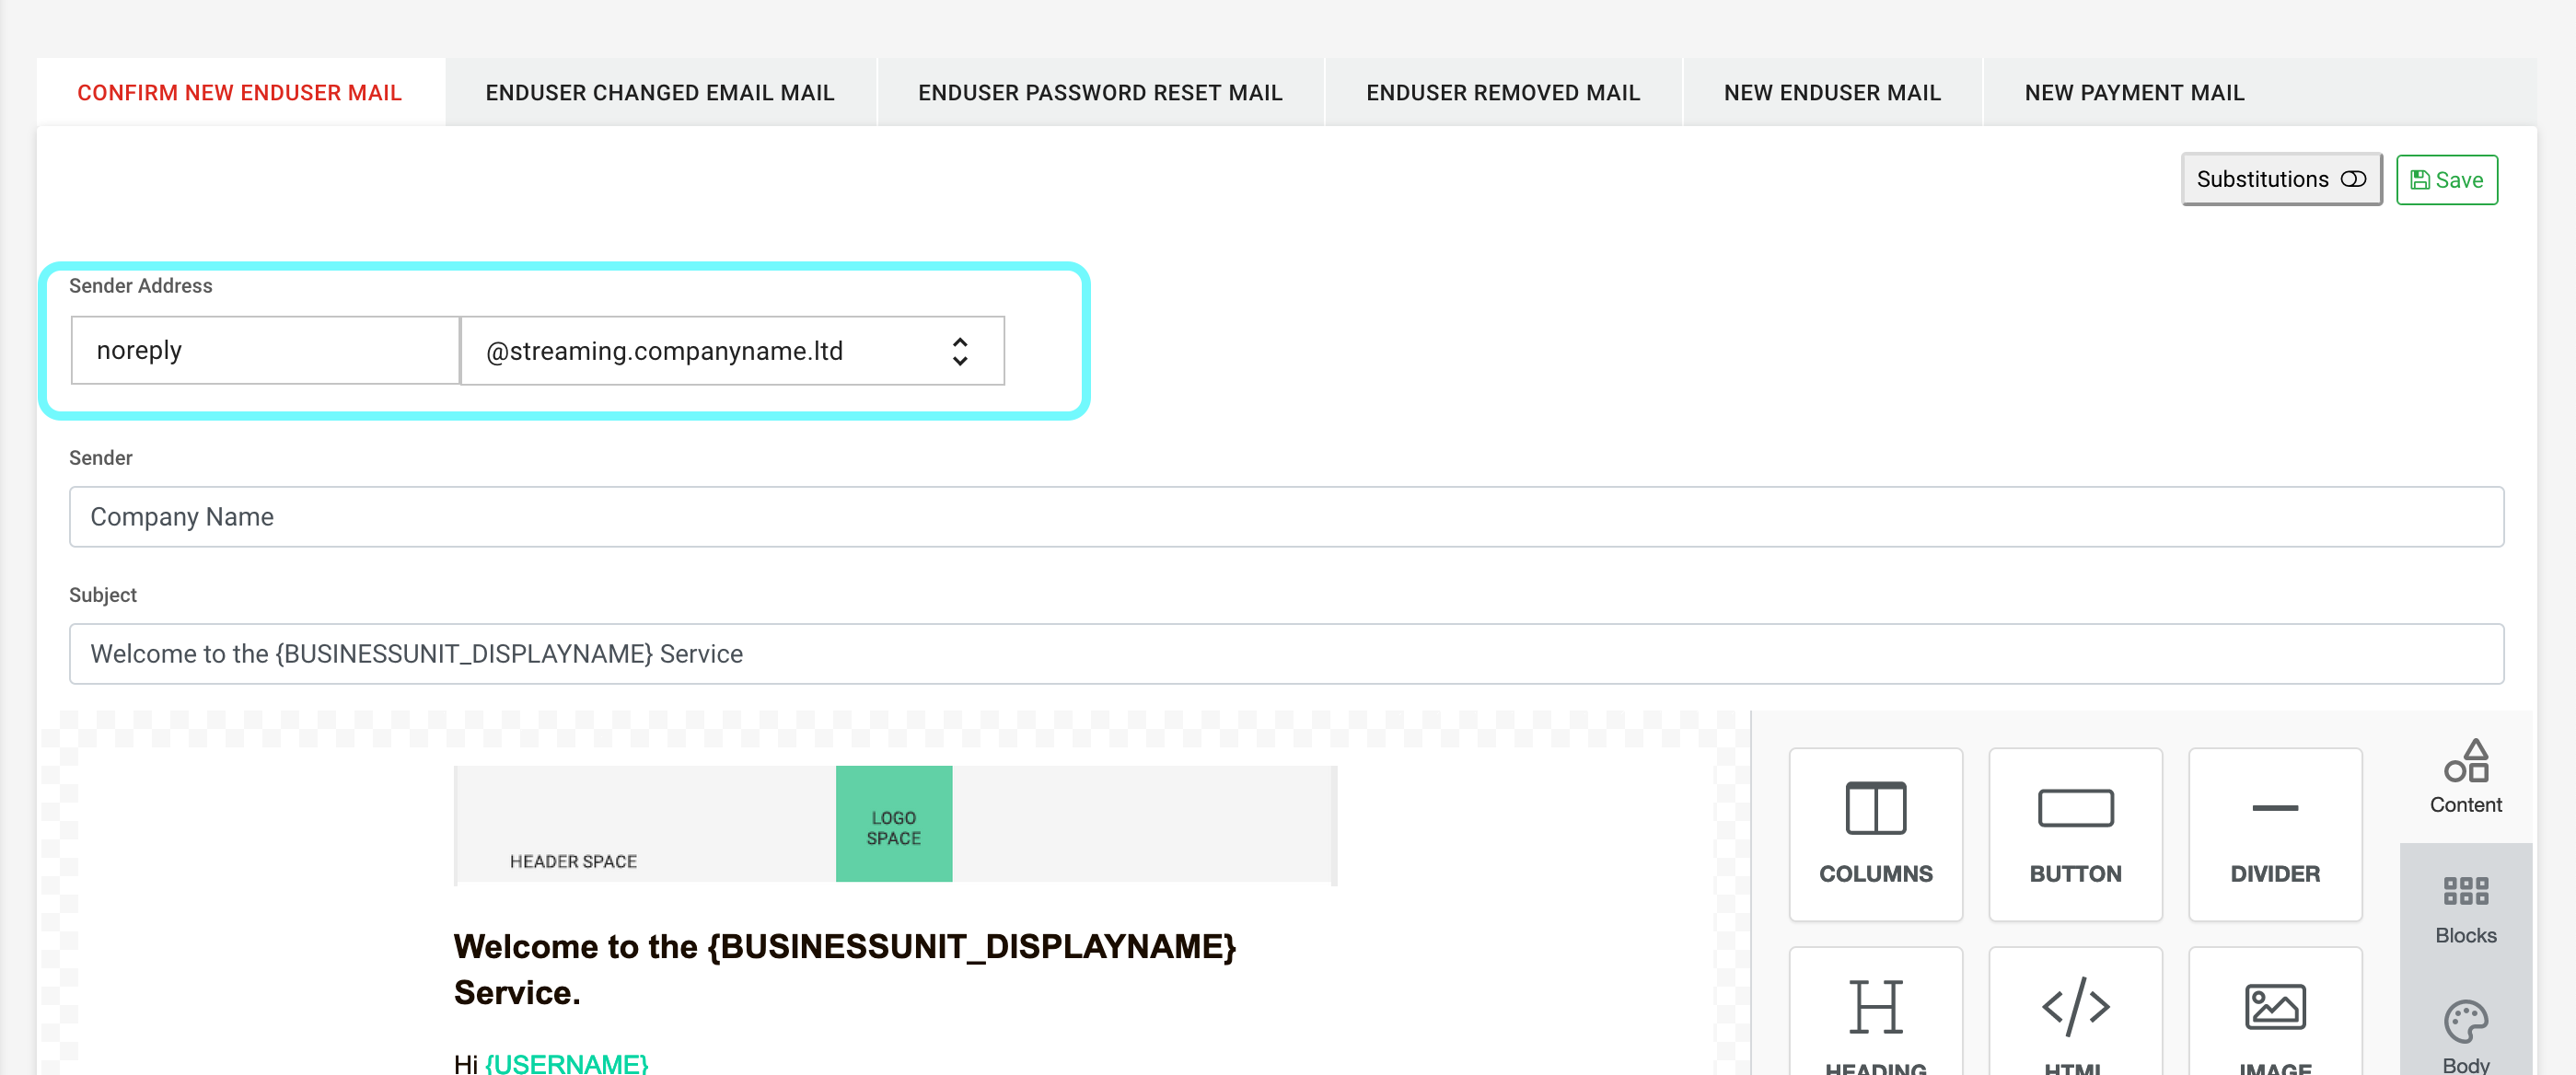
It should now be possible to configure the sender address for a template.
Configure Sender Address
- Use the dropdown to select which domain that should be used.
- Type the prefix that should be used for the mail template
Example
Prefix: noreply
Domain: @streaming.companyname.ltd
Result: noreply@streaming.companyname.ltd
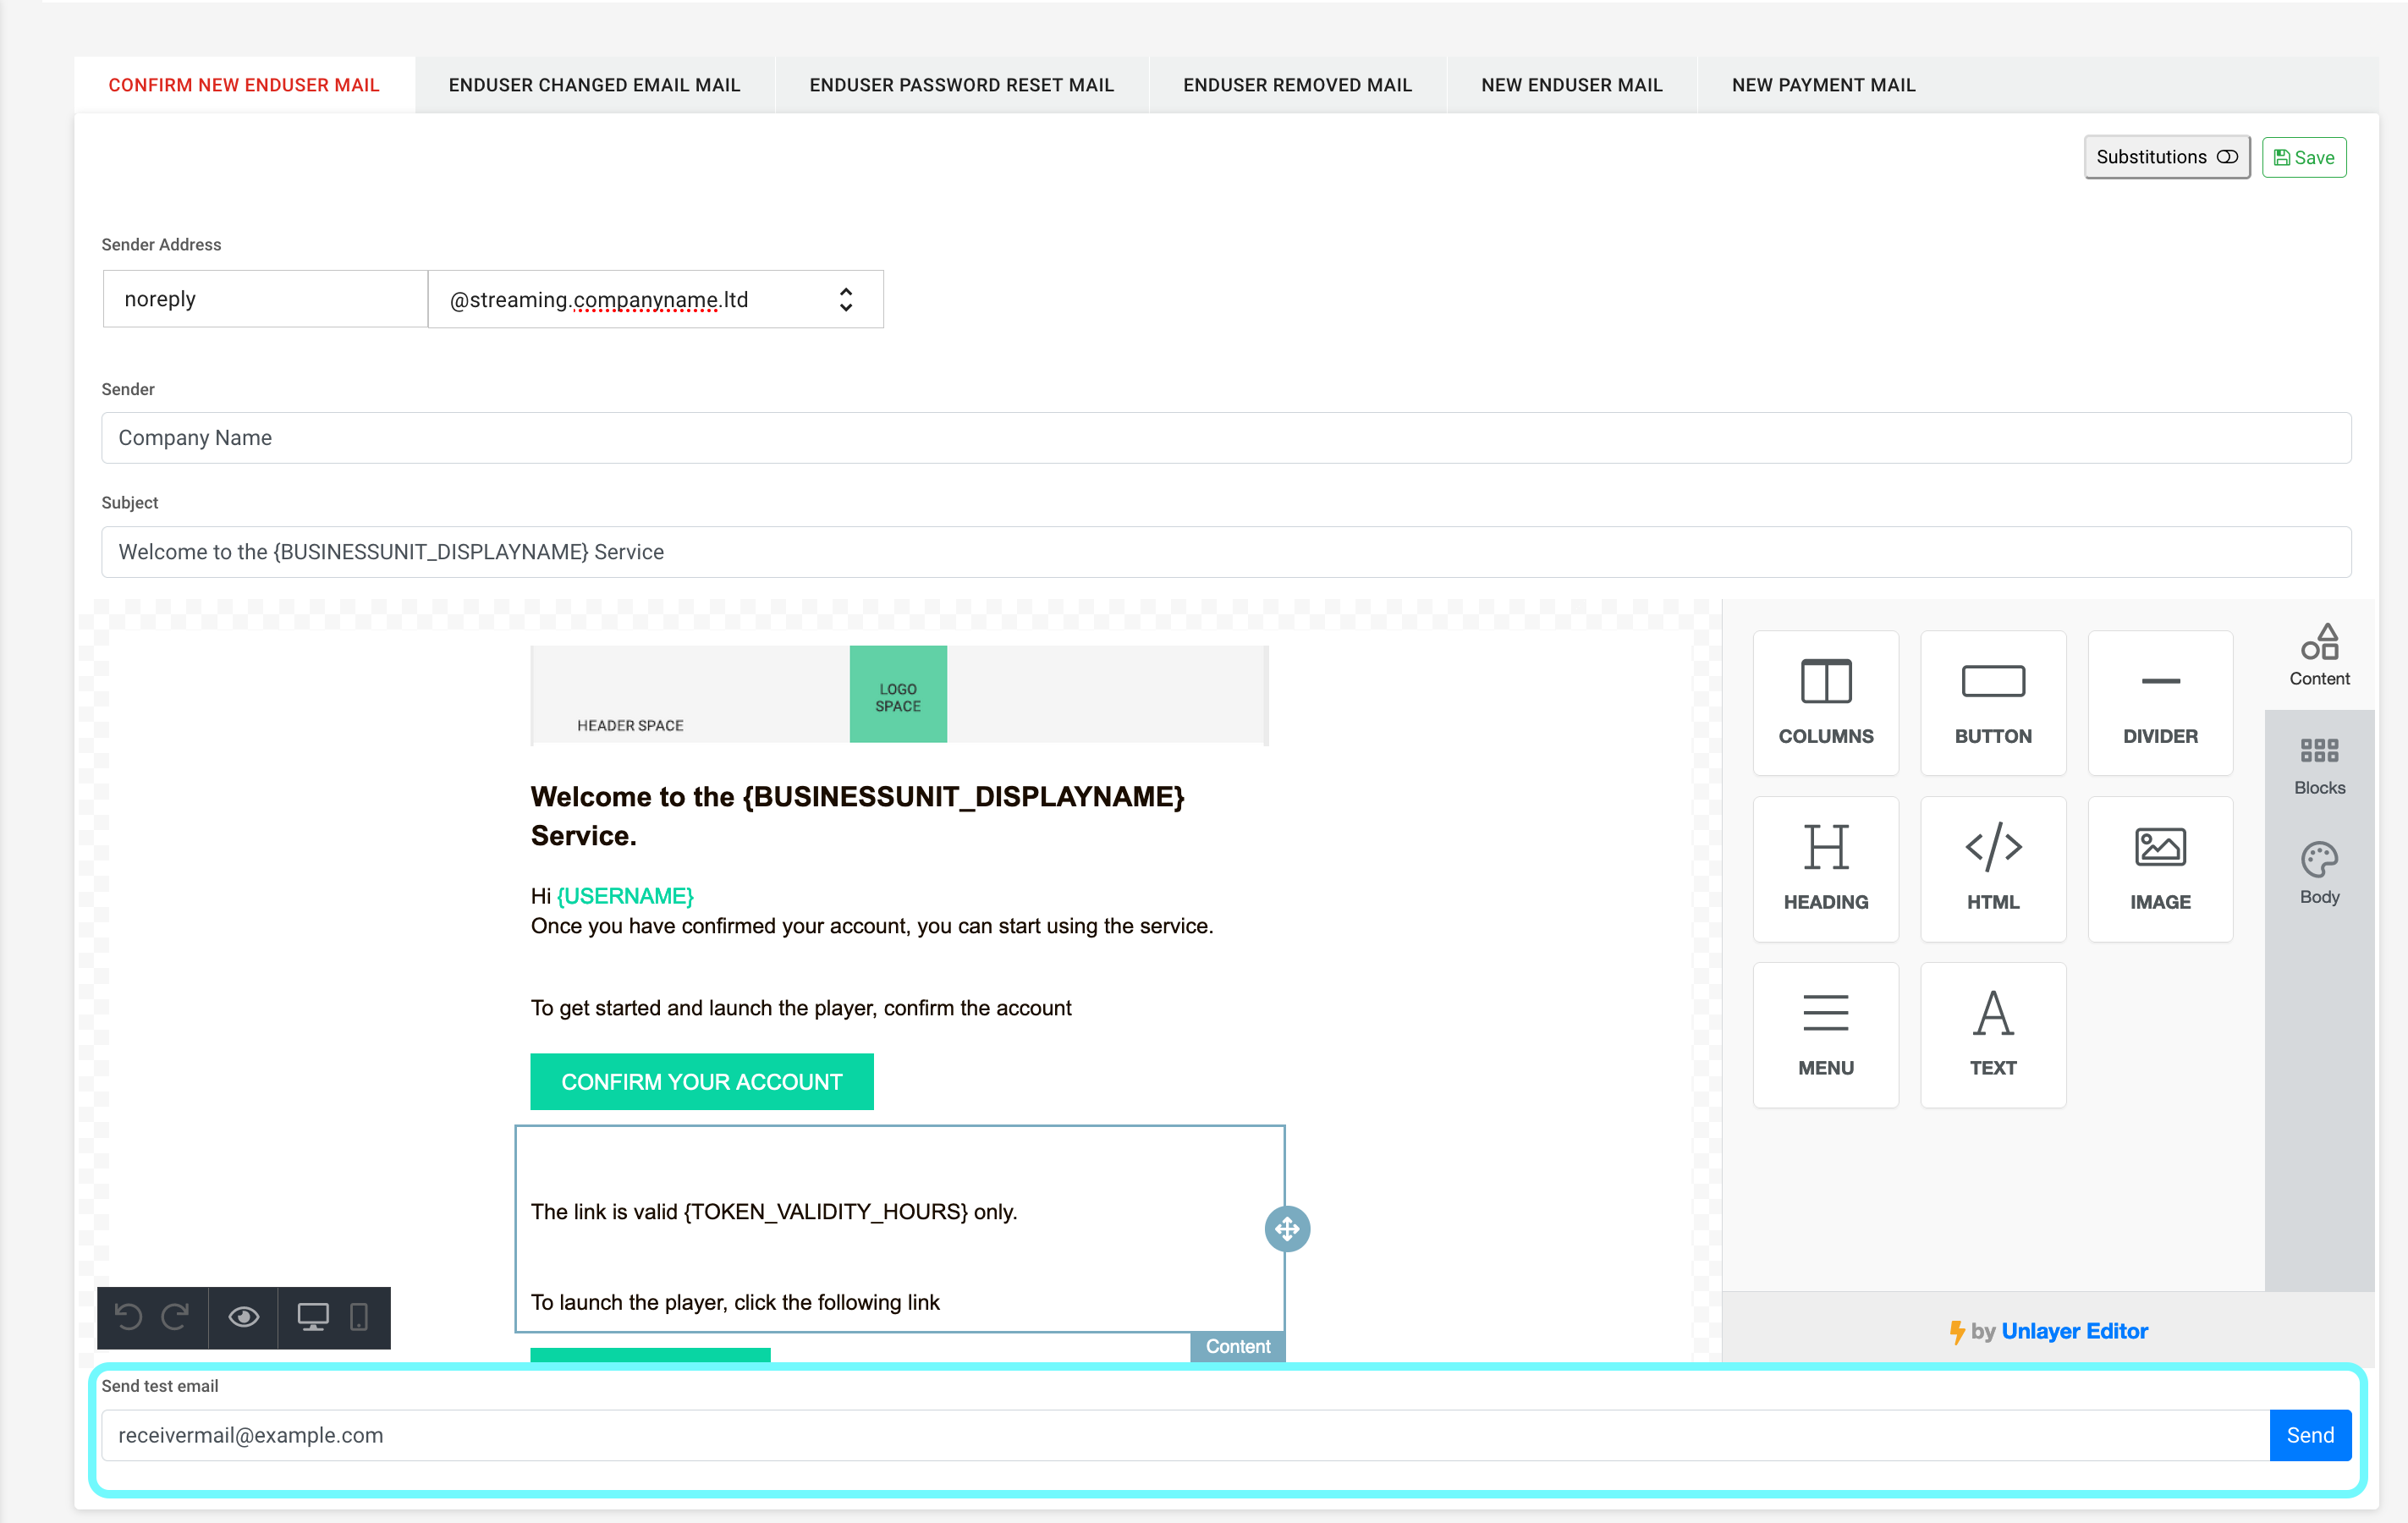
Verify setup
To verify the setup, a test email can be sent further down on the page.
- Type the receiver email address
- Press
Send
Troubleshooting
If the sender address configuration is not shown, please make sure that the status of the DNS-records has been changed to TRUE in the email domain details.
If the status is still FALSE, that usually means that the email domain could not be verified by your DNS provider.