Batch editing in the Customer Portal
Overview
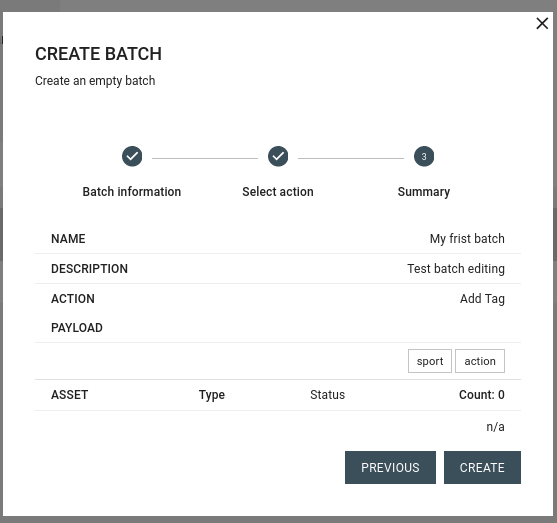
Batch editing allows an editor to select an action that should be applied to multiple assets. The action is first verified against all selected assets and any possible errors are reported back to the editor. If all the assets pass verification the editor can run the batch job. Batch jobs can be edited, both the action and which assets it should be applied to, as long as the job has not been started. A job that has been completed can be copied and modify to create a new job.
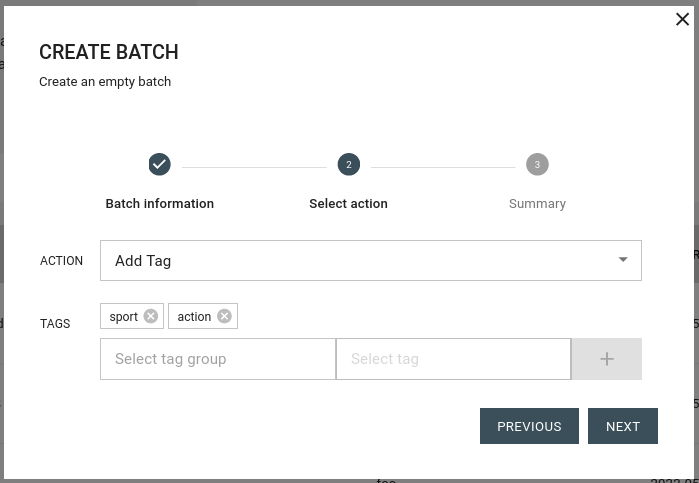
Supported batch actions
It is our goal to continuously add more actions to make managing you assets easier. If you have any specific batch actions that you would like to see please contact your CSM. Supported Actions:
- Add tags: Add one or more tags to the selected assets.
- Remove tags: Remove one or more tags from the selected assets.
- Add publication: Add a publication to the selected assets.
- Remove publications: Remove all publications matching a query from the selected assets.
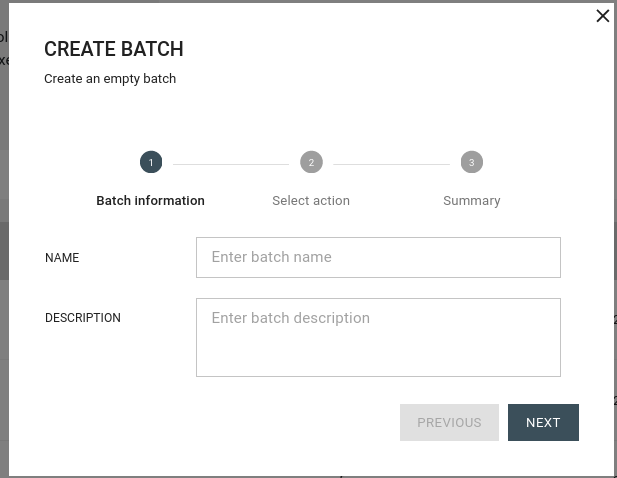
Creating a batch job
There are two ways to create a new batch job:
- From MONITORING -> BATCH: A widget for creating new batches is available at the top of the page.
- From CMS -> ASSETS: Select any number of assets using the checkboxes in the list and then clicking the BATCH button at the bottom of the page.
From this point the two methods are the same except that when you create a job from CMS -> ASSETS you can choose to add the selected assets to an existing job or a new job.
Editing a batch job
Similar to creating a batch you can edit it in two ways.
- From MONITORING -> BATCH: You can find your job in the list of jobs and click the edit button. You will see the same pop up as you did when creating the job and can navigate through the steps to update the name and description, change the action and remove assets from the job.
- From CMS -> ASSETS: You can add assets to your batch job by selecting them with the checkbox on the left side of the list and then clicking BATCH and selecting an existing job in the dropdown. From this entry point you can not edit the name or description of the job, but you can change the action and remove assets.

Verification and Running a job
Each time a job is updated a verification process is automatically started. In MONITORING -> BATCH you can see the status of you batch jobs. By opening the edit pop up you can see more details about why a job failed verification and which assets that failed verification.
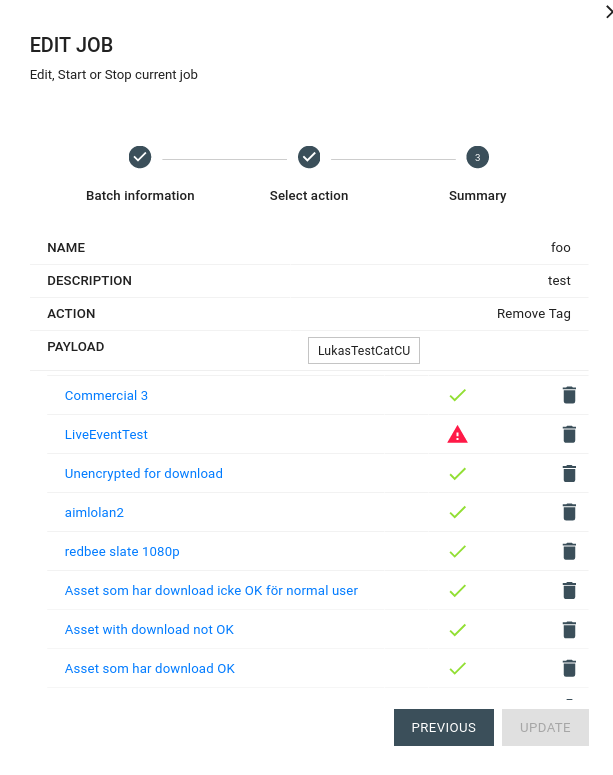
If a job has passed verification (indicated by a green checkmark) you can press the play icon to run the job. When the job has completed successfully the status column will show a double-checkmark. If a job fails for one or more assets you can see the details by clicking the edit button. You can see for which assets the action failed.
Copying a job
Once a job has been run you can no longer edit it, but if you open the edit pop up you can make changes and create a new job based on the old one. This can be useful if you want to apply the same action to a new set of assets or a new action to the same set of assets. E.g if you want to replace a tag on a set of assets you can first run a ADD TAG job with the new tag and then create a copy of that job and change the action to REMOVE TAG.
Undoing a job
When a job has finished it is possible to undo it. Just click the undo button and the change applied by the job will be undone. Note that this is different from executing a new job with the "opposite" action. E.g. if you run an "ADD TAG" job with tag MY_TAG on a set of assets the tag will only be added to the assets which did not already have that tag. If you then undo the job the tag will only be removed from the assets where the tag was added. If you instead run a "REMOVE_TAG" job with the same tag on the same assets the tag will be removed from all assets, including those that had that tag before the first job was executed.