Configure Your Service - End User Access
Your service can be configured to support different ways for end users to access your service.
You can control how the service can be accessed:
- No login.
- Login is available.
- Login is required.
- Payment is required.
This guide describes how to control this.
If users may login this guide also describes how to setup the service so that end user can create account by self service.
No Login
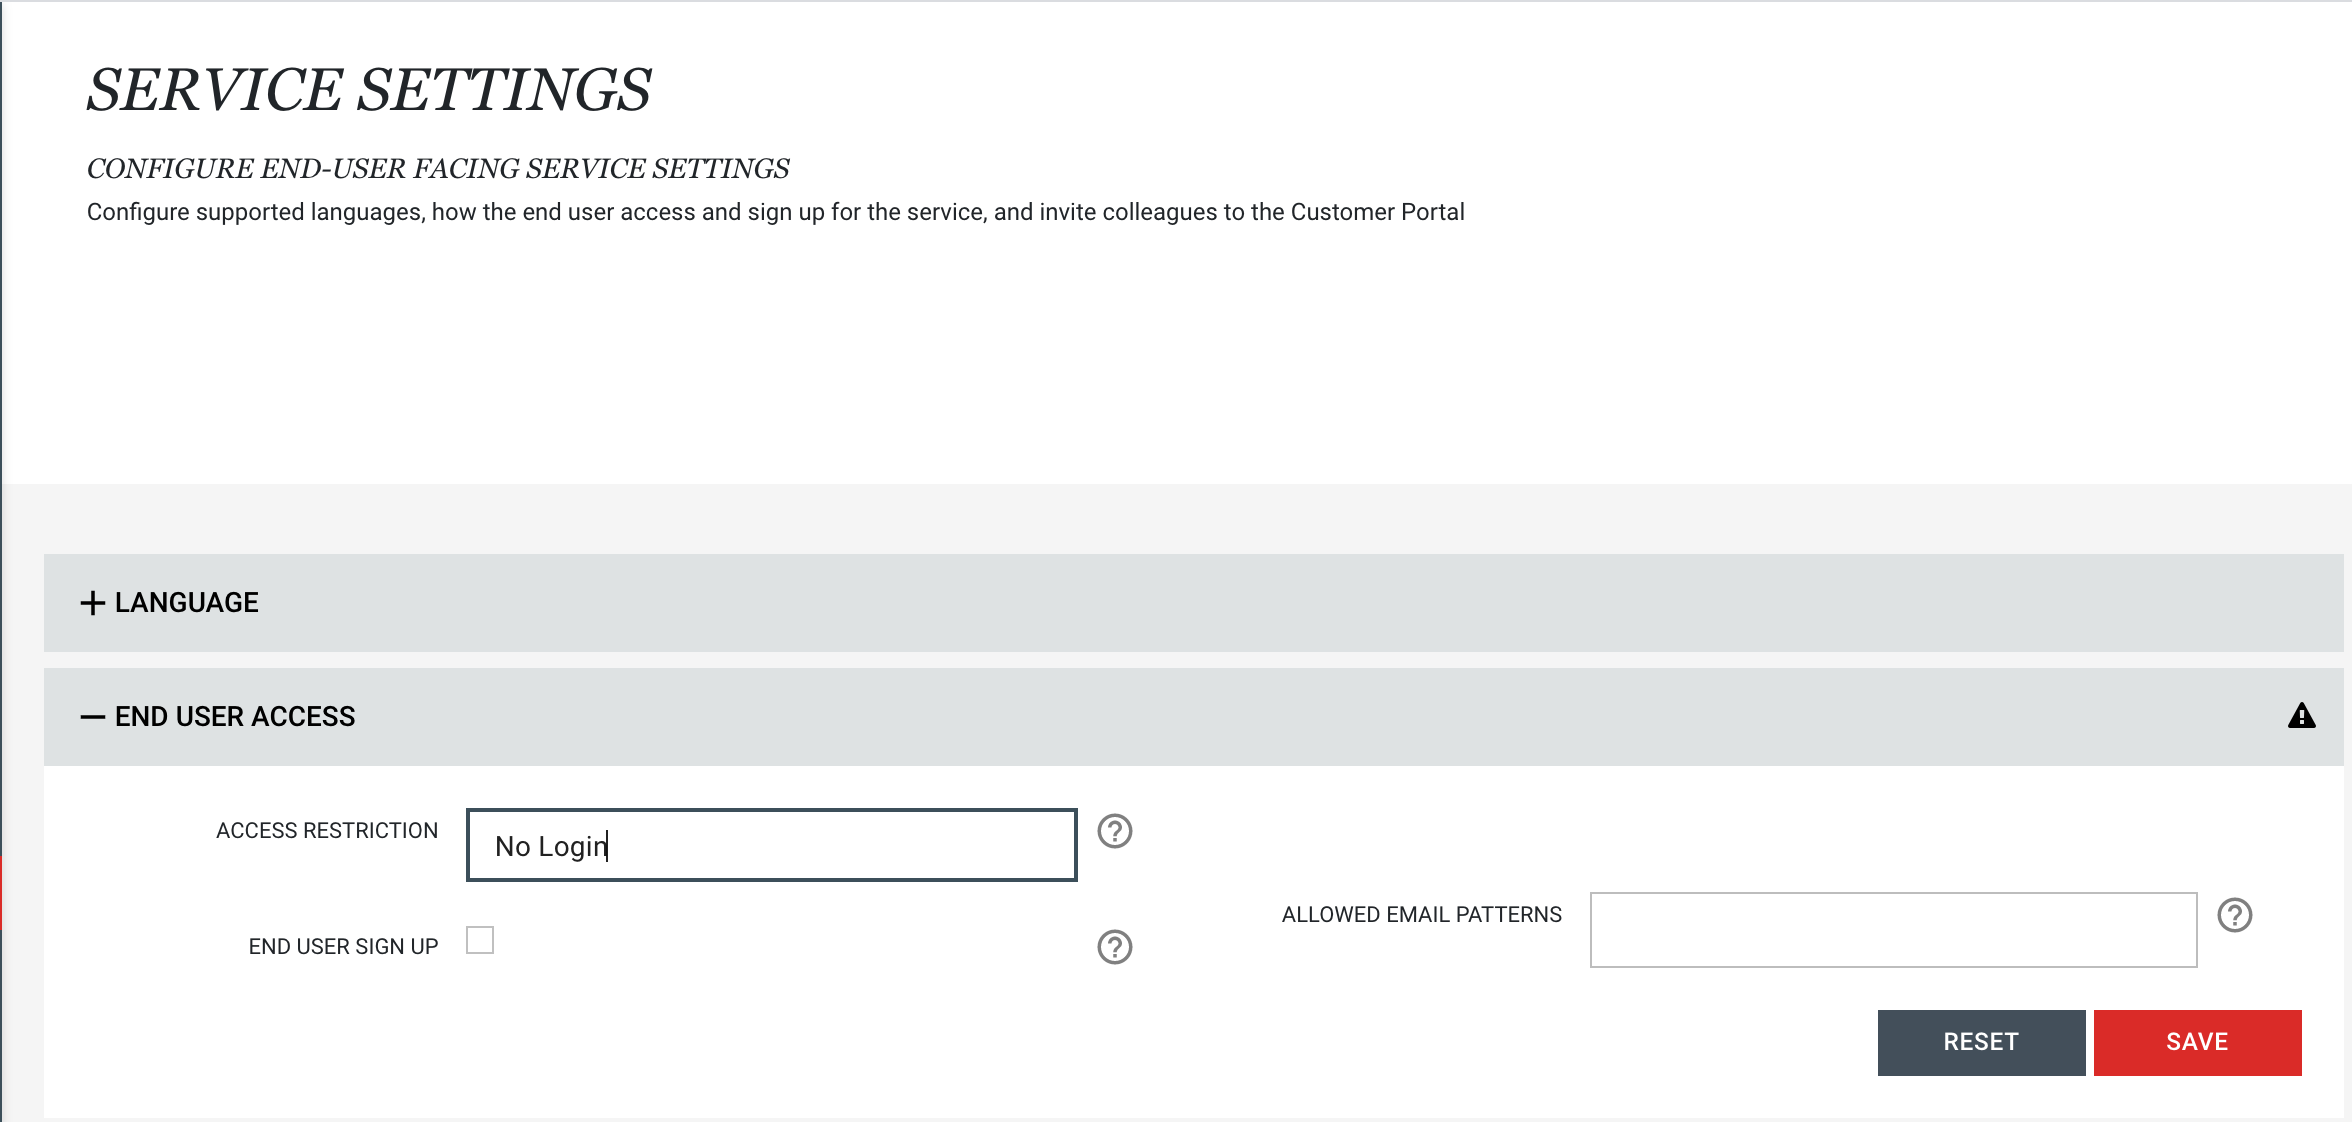
Goto the Portal -> Settings -> End User Settings page and select End User Access.
In this model users can use the service without login.
Select the User Access -> No login option and Save.
Login is available
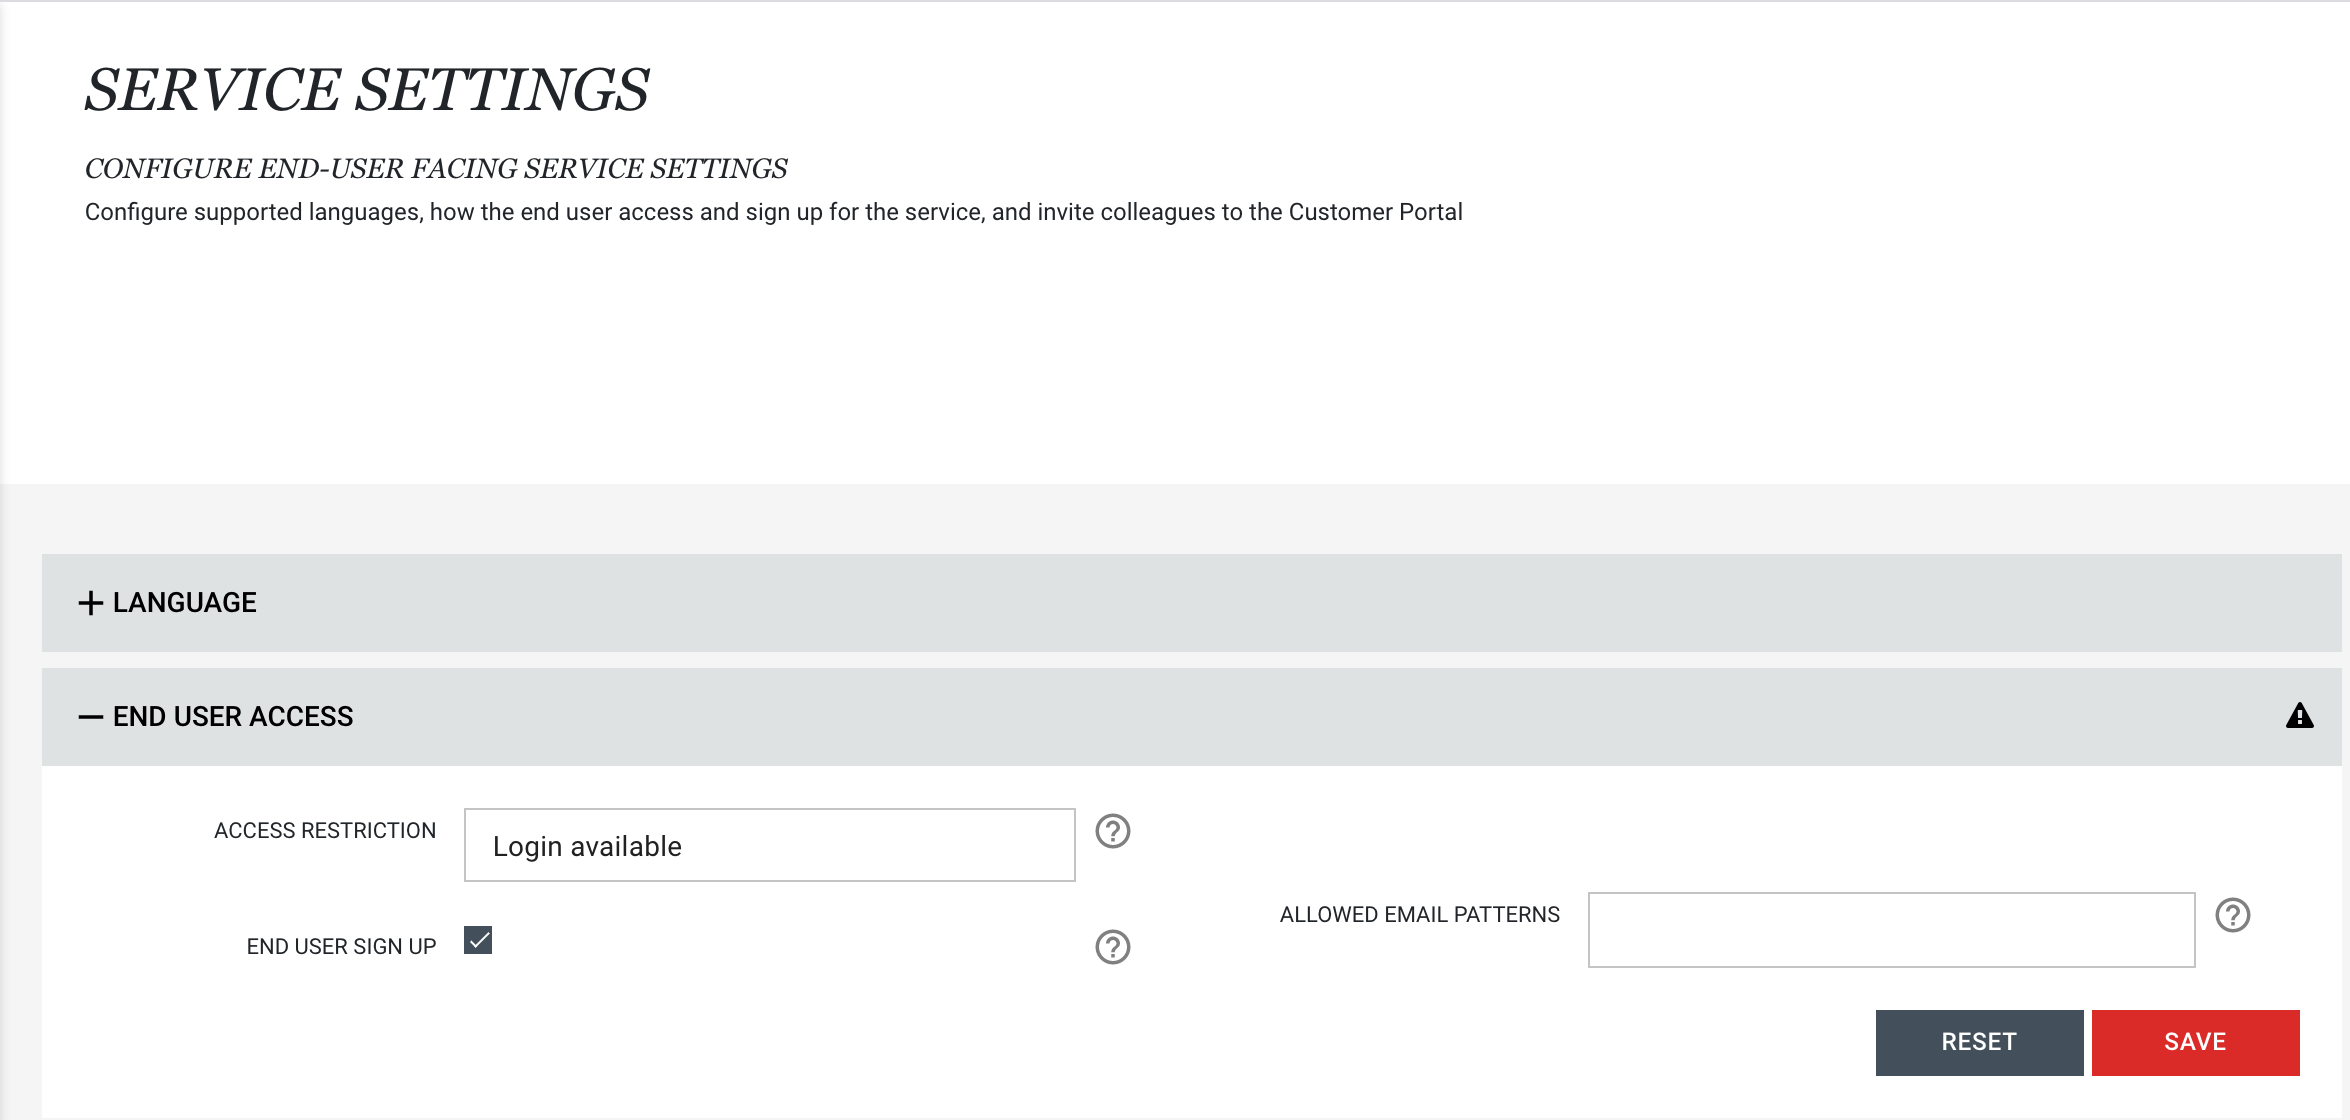
Goto the Portal -> Settings -> End User Settings page and select End User Access
In this model user may login but are not required to do so, some parts of the service may require login or even payments.
Select the User Access -> Login available option and Save.
In this example the Allow Self Service checkbox is checked, this means that any user can signup as a user. If not checked all user need to be invited using the Customer Portal.
Login is required
Goto the Portal -> Settings -> End User Settings page and select End User Access
In this model user must login to the service.
Select the User Access -> Login required option and Save.
In this example the Allow Self Service checkbox is checked and an email pattern is entered in the Mail-patterns input box. This means that only users having an email address that contains this pattern may create accounts.

Payment is required
Goto the Portal -> Settings -> End User Settings page and select End User Access
In this model user must both login to the service and purchase, or subscribe, to content.
Select the User Access -> Payment required option and Save.
In this example the Allow Self Service checkbox is checked, this means that any user can signup as a user. If not checked all user need to be invited using the Customer Portal.
